Friday, August 28, 2015
Wednesday, August 26, 2015
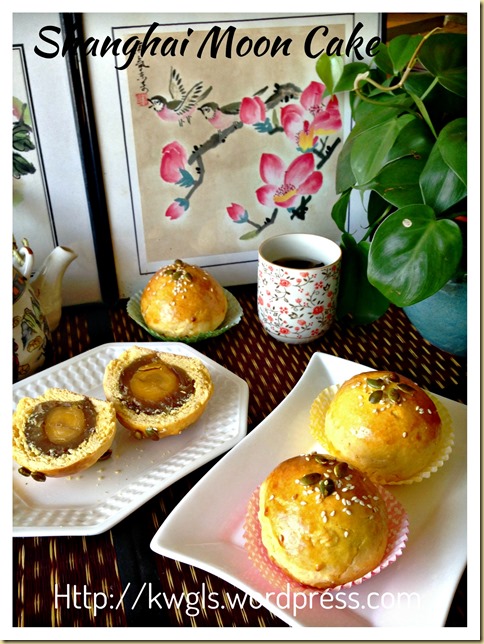
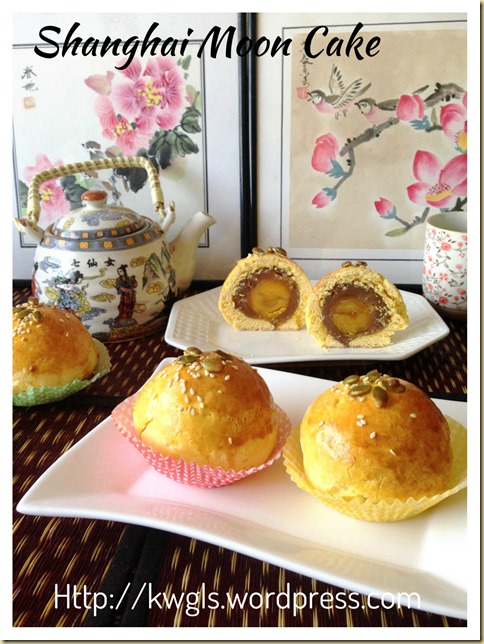
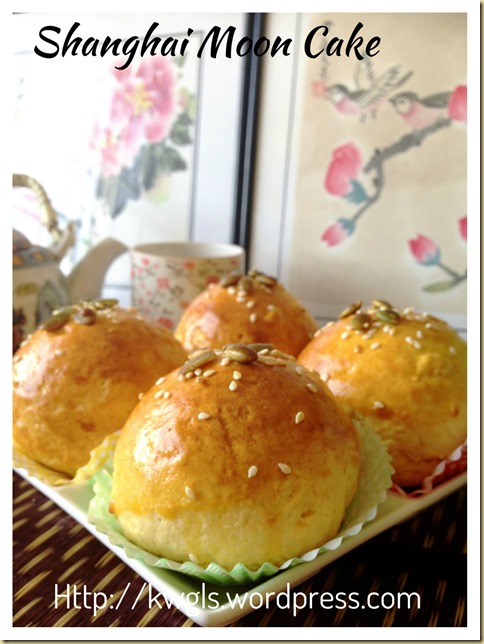
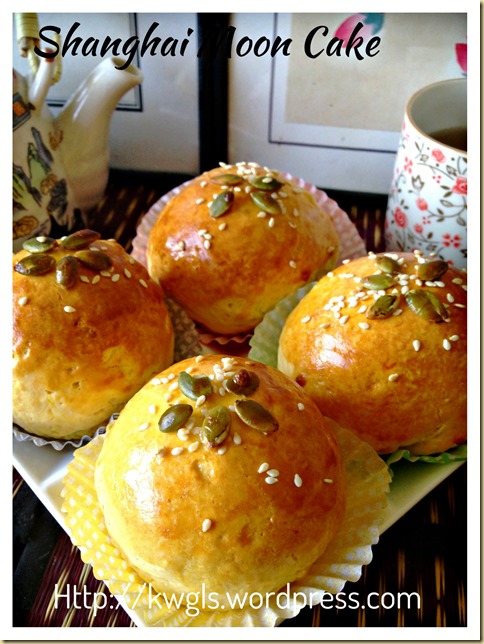
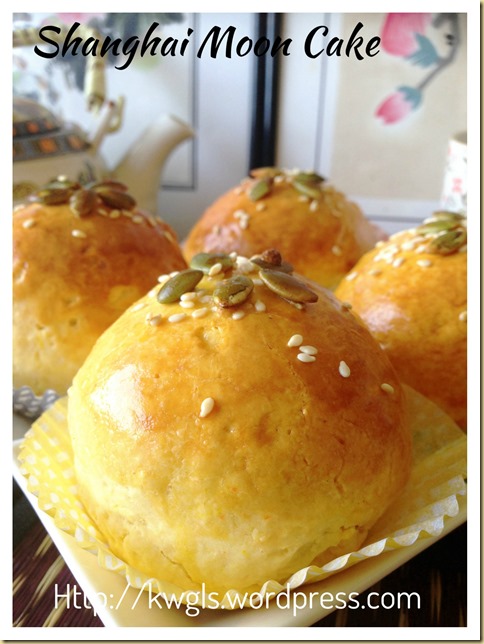
Is This Moon Cake Originates From Shanghai?
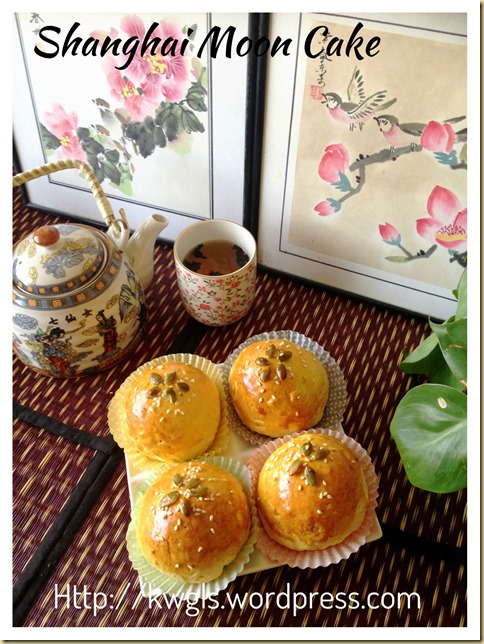
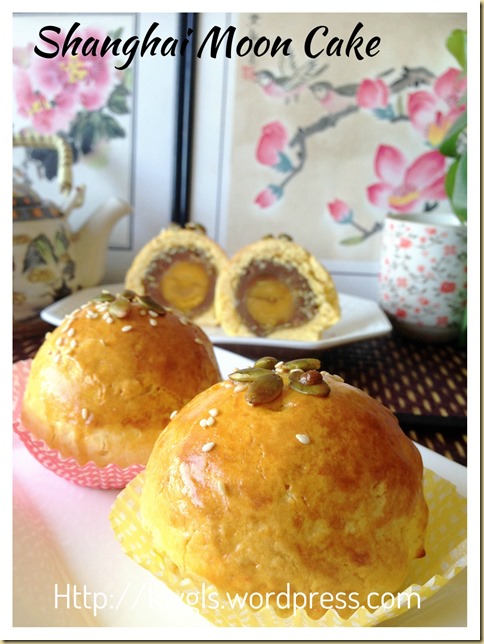
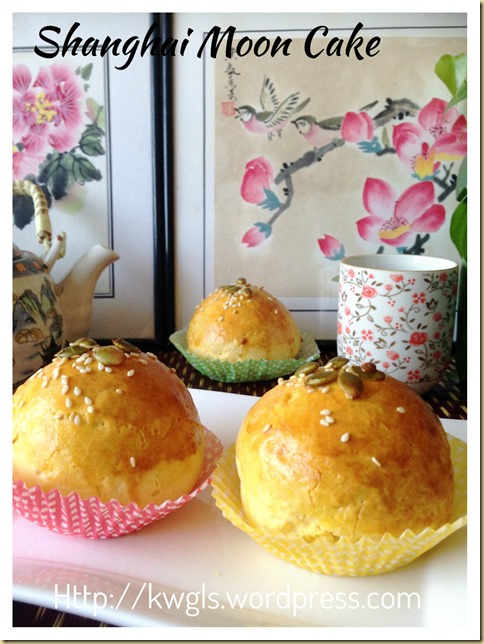
Is This Moon Cake Originates From Shanghai? Shanghai Moon Cake (上海月饼)
Posted on August 5, 2014 by Kenneth Goh
INTRODUCTION
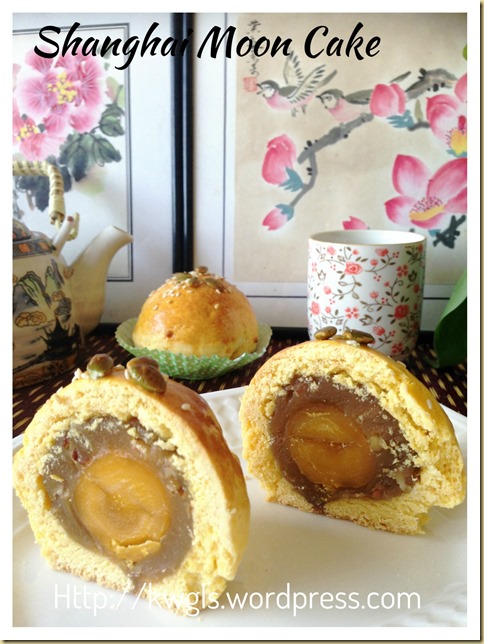
My kids loved Shanghai moon cakes not because of the egg yolk or filling, but the short crust pastry. At times, while I am not paying attention , they will “dig” out and throw away the filling and egg yolk and eat the pastry only.. The same with my wife who is not a fan of moon cake at all.
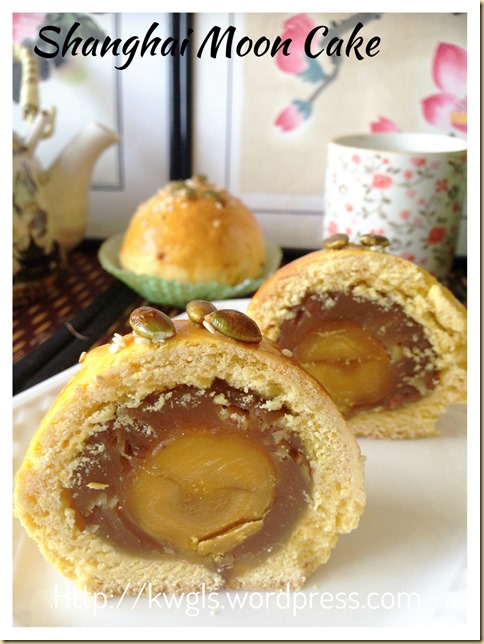
As a result, I have decided to prepare some moon cakes that are “thick skin” with minimum fillings.. But the recipe have been adjusted to the ratio of one filling to one skin (Skin: filling = 1:1).
I have a post on short crust pastry mooncake last year resembling the one sold by the famous bakery in Kluang. Locally, they called it the “mouse moon cake” and if you are interested, you can take read the post; Moon cake – Short Crust Pastry Moon Cake
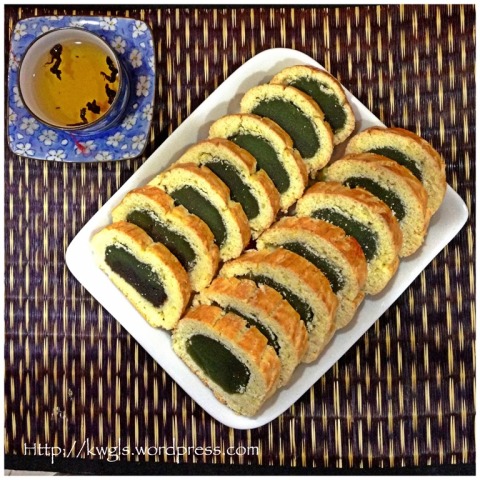
The colloquially so called Shanghai moon cake is characterized by its short crust pastry but it seems that Shanghaido not have such type of moon cake. It was not even listed in the Wikipedia’s listing of moon cake. The origin of it is rather doubtful..
Putting that aside, the Western style of short crust pastry definitely goes well the oriental moon cake fillings.
This recipe is my recipe modified from the above post. I have used butter instead of vegetable shortening as what most other recipe have called for.
Preparation is not difficult at all. In fact, among all the moon cakes, this should be one of the easiest and failure rate is very low.
The size of the moon cake will depends on your preference and if you like smaller sizes, you will need to get hold of more salted egg yolks as compared to 4 stated in the recipe.
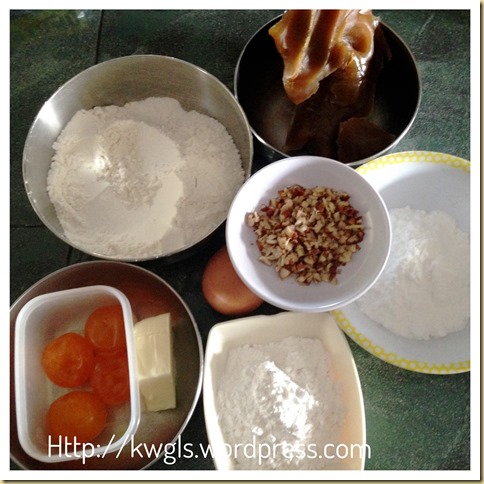
WHAT IS REQUIRED
Servings: Prepare 4 Shanghai Moon cake
Short Crust Pastry
- 80 grams of butter, chilled and cut into cubes and keep in the fridge waiting for later use
- 1 egg, lightly beaten
- 200 grams of self raising flour, sifted
- 40 grams of sugar powder
- 30 grams of custard powder
- 20 grams of milk powder (not in picture)
- 1-2 tablespoons of milk (not in picture)
Fillings
- 4 salted egg yolks (pre-steamed for 5 minutes or microwave for15 seconds)
- 50 grams of chopped walnuts
- 350 grams of lotus seed paste
Egg washing
- 1 egg yolk plus 1 tablespoon of milk plus a few drops of cooking oil, beat and sift
Others
- Some melon seeds for decoration
- Some sesame seeds for decoration
STEPS OF PREPARATION
- Preheat the oven to 180 degrees.
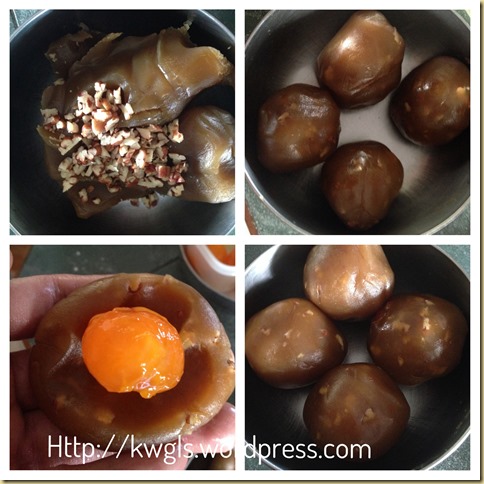
- Mix the chopped walnuts to the lotus seeds fillings, knead until well mixed. Divide into 4 balls (or your desired number of balls), wrap a salted egg yolk in each ball. Shape round and set aside for later use.
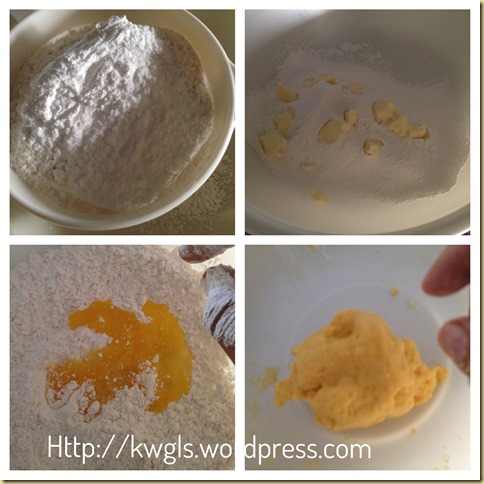
- Sift custard powder, self raising flour, icing sugar and milk powder in a bowl. Add the cold butter and use fingertips to rub the butter until it resembles some crumbs. Add the beaten egg yolk and cold milk, lightly knead until it forms a pliable dough. If the dough is too dry, add teaspoon by teaspoon of milk gradually.
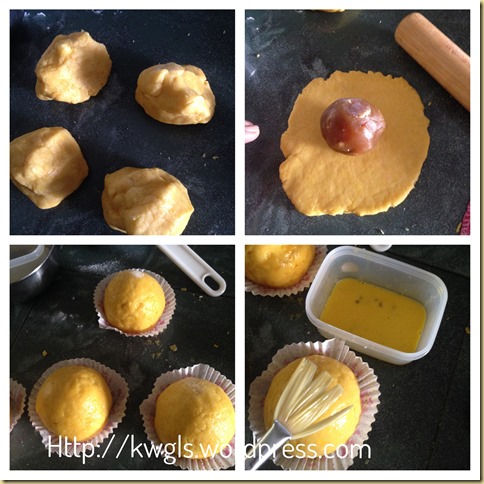
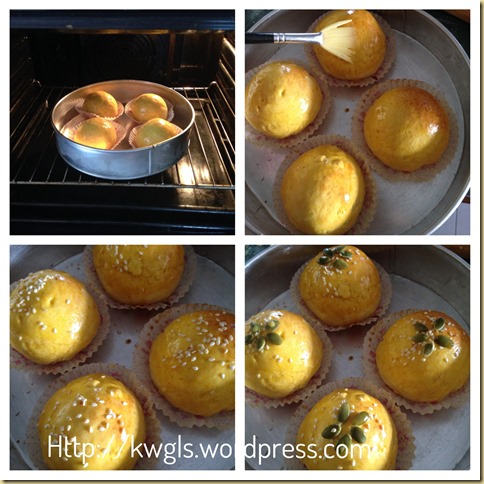
- Divide the dough into 4 equal balls (or your desired number of balls). Take one ball, flatten the dough, wrap a ball of filling, seal the edges and transfer to the cupcake cups or a lightly greased tray. Egg wash the dough as thoroughly as possible and baked in the oven for 10 minutes.
- After 10 minutes, egg wash for the second time and while it was wet, put the melon seeds and sprinkle with some sesame seeds. Send back to the oven and baked again for another 10-15 minutes. The baking time is for your reference and depends very much on the size of your moon cake. (Note: Alternatively, you can choose to egg wash once, but you have to put the melon seeds and sesame seeds once you do your first egg wash).
CONCLUSION
This is the ratio of one filling to one skin (1:1) However, do make provisions for yourself and choose a ratio that you are most comfortable (possibly 1.2 skins : 1 filing) with and come out with a presentable moon cake. This dough can be rather dry, remember: Add cold milk TEASPOON BY TEASPOON until you are able to handle it. Handling shall be light and swift for the pastry.
This recipe was included in Page 14-15 of the “Easy Mooncake Recipes E-book”. For more mooncake recipes, you can have a copy of “Easy mooncake recipes – A step by step guide” that was packed with 20 recipes, 45 pages at a reasonable convenience fee of USD4.00. The recipes covered various recipes from durian mooncake, traditional baked mooncake and also the less common Teochew mooncake . You can purchase by clicking the link above.You can either pay using Pay Pal or Credit card account. Please ensure that you have an PDF reader like Acrobat or iBooks in your mobile phone or iPad if you intended to read it in your ipad or mobile phone. Should there be any problems of purchasing, feel free to contact me at kengls@singnet.com.sg and separate arrangement can be made.
For this year, I have planned to prepare this moon cake as hand gifts to friends and relatives if there are additional images, I will upload in the post.
Hope you like the post today. Cheers and have a nice day.
- For more recipes, you can refer to my RECIPE INDEX (updated as at 28 July 2014) here and you can follow me at PINTEREST or visit the blog’s FACEBOOK PAGE to keep abreast of my future posts.
-
- If you are a Pinterest user and you are interested to have more recipes, you can join or follow this Pinterest Board set up by me where there are more than 2600 recipes worldwide and pinned by various bloggers: FOOD BLOGGERS AND FOODIES UNITED PINTEREST BOARD.
https://kwgls.wordpress.com/2014/08/05/is-this-moon-cake-originates-from-shanghai-shanghai-moon-cake-%E4%B8%8A%E6%B5%B7%E6%9C%88%E9%A5%BC%EF%BC%89/
Sunday, August 23, 2015
无蛋金瓜咖椰 Pumpkin Kaya
无蛋金瓜咖椰 Pumpkin Kaya
看回以前做过的咖椰作品
觉得这次做的最让我满意
浓稠度刚刚好 不会太甜
口感顺滑 颜色鲜艳
配上面包一定是超赞!
之前做的咖椰都是用淡奶来炖煮
但是这次选用了椰浆
在加上直接用小火来煮
速度时间快了许多 也不必站上一个小时
太喜欢这种方法了 省时又省力
味道也一样香醇
加了些许班兰叶一起烹煮
淡淡的香气 加上金瓜的口味
真是不错!
金瓜 300g(蒸熟压成泥 )
糖 130g(我减至110g)椰浆 200g
班兰叶 4片(打结)
做法:
1。把金瓜蒸熟,压成泥状。
2。混合所有材料,然后用料理搅拌机搅拌成幼滑的金瓜糊。
3。倒入祸里,加入班兰叶,用小火边煮边搅拌至浓稠(个人喜好浓稠度)即可。
4。装入玻璃瓶里,待凉才盖上盖子。
**在煮咖椰的时候,要不停的搅拌,以免粘锅。
**全程我只用了15-20分钟来烹煮咖椰。
http://ifoneday6666.blogspot.com/2013/09/pumpkin-kaya.html
Pumpkin Kaya
Pumpkin Kaya
I love kaya. Love it so much that I can eat it on its own. It's not that healthy as there are lots of eggs used to make kaya traditionally. So this Pumpkin Kaya recipe that I chanced upon got me really excited, because no eggs are required at all!
Pumpkin Kaya
recipe from Everybody Eats Well in Flanders
(my notes in red below)
Ingredients:
500g pumpkin, steamed and mashed
300g coconut milk
180g brown sugar (I used 150g brown sugar)
2 tbspn custard powder
1/2 tsp salt
4 pcs of pandan leaves (I used 5 pcs)
Method:
1. Remove pumpkin skin, deseed and cut into cubes. Steam for about 15 minutes or until the pumpkin meat is soft. Drain excess water and mash pumpkin with a fork while still hot.
2. In a big bowl, mix coconut milk, brown sugar, custard powder and salt.
3. Add mashed pumpkin and mix well. Sieve the mixture into another bowl. (I used my blender to give it a good blitz instead)
4. In a non-stick pot, pour the pumpkin mixture and cook over low heat. Add in pandan leaves. Cook and stir constantly until the mixture has thickened and set, about 15 minutes.
5. Remove pandan leaves and allow the mixture to cool. Keep in sterilized jar and store in the fridge.
Note:
Ginny from Singapore Home Cooks shared that she uses gula melaka. I think this is a great idea! I'm sure the kaya will be really awesome!
I am submitting this post to Little Thumbs Up October Event: Pumpkin, hosted by Eileen of Eileen’s Diary and organised by Zoe of Bake for Happy Kids and Mui Mui of My Little Favourite DIY
Source: http://lykitchenventure.blogspot.com/2014/10/pumpkin-kaya.html
Subscribe to:
Comments (Atom)
